On this tutorial, I will be covering how to put together the Raspberry Pi using the Raspberry Pi 2 as the example. I may expand this in the future to show the Raspberry Pi Zero all together, too.
So let's start.............
This is the Raspberry PI 2 in the case with the top of the case removed. As I have mentioned in part 1 of my RPi columns, the Pi cost $35 and the case is $6.

this is the monitor I'll be using. I picked it up used at FreeGeek here in Chicago At Kimball, Diversey, and Milwaukee. The cost was $15. It uses a DVI connection.

This is the wireless adapter that is certified to work. This is important. Most wireless adapters will NOT work with the Raspberry Pi. This cost me $10 at MicroCenter on Elston in Chicago.

This is a picture of it inserted in the Pi.

This is the USB flash drive that use for saving files or photos or whatever I want to keep. Notice the size. This is important. Even though any flash drive will work, almost all will have a case that is too large for the Pi without blocking other USB ports. This is a SanDisk USB drive, 16gb of storage, and $8 (on sale) at Best Buy.
The next photo is of the flash drive and wireless adapter side by side on the Pi. You can see why "size matters".


This is the keyboard/mouse I decided on. It's all one so that I don't need two ports. It cost me $35 at MicroCenter. The photo after that shows it plugged into the Pi.


Next up is a USB hub so that I will have four more ports instead of just one. Most people won't have a need for this, but me being me and always trying to play mad scientist, I often need the use of several USB ports, more than the 4 that are on the Pi. The photo after that is the hub plugged in. The cost was $12 at MicroCenter.
Additional note. There are two main types of hubs. There is powered and non-powered. The one I'm using here is non-powered. What this means is if I have any USB devices that get their power from the port, they will NOT work on this hub.
I do have another hub that is powered, but I didn't include it in this tutorial because it requires and additional outlet.
If people want me to show that also, I can very easy.
Note: Yes that is a mini altoids tin in the background. I use it for caring different mini SD cards and adapters. I put it there for size comparison. And it's the mini not the standard size altoids tin. That would have dwarfed the Pi.


As I stated at the beginning, The monitor is a DVI, but the Pi uses HDMI. So I had to purchase an adapter, which turned out to be cheaper than buying a used HDMI monitor ($35). The cost of the adapter was $3 clearance at MicroCenter.

Here's a photo of the HDMI connector on the Pi. There are other methods of connecting a monitor, even an old TV from the 70's like you would see on "That 70's Show" for those that are not old enough to actually remember (unfortunately, I am. WHERE'S MY DAMN CANE, WHIPPER SNAPPER).
The next photo shows everything plugged in.


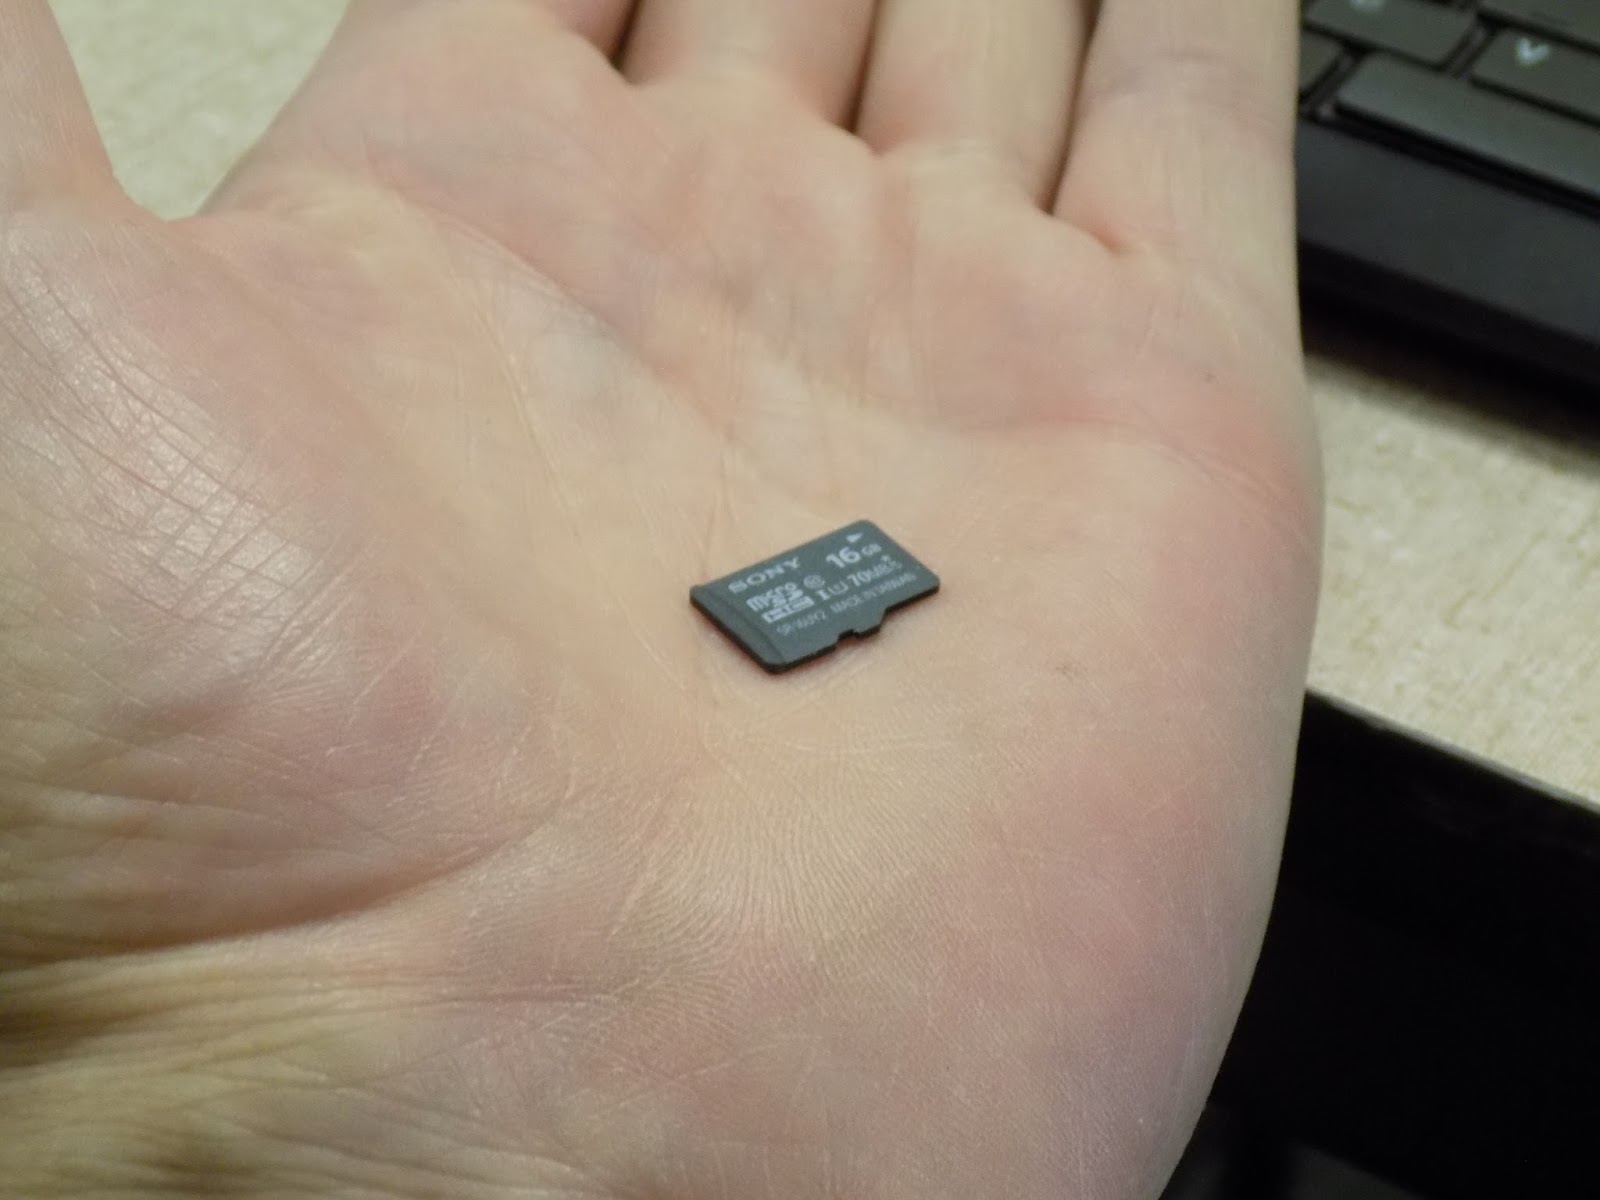
This is the mini SD card I used, both top and bottom view. It's a 16gb capacity and is a class 10 (very important). I believe I paid $10 at Best buy. I use strictly for the OS and any software I want to install. Any data, I save to the Sandisk USB drive.

This is a photo of the Raspberry Pi completely booted up and running.

This is a closeup of the power connection which is immediately to the left of the HDMI adapter. I'm using my cell phone charger. Now, the next thing I'm going to say is EXTREMELY IMPORTANT!!!

Do not use an adapter rated more than 5 volts or you will INSTANTLY burn out the Pi. Do not use an adapter that is rated for less that 4.5 volts or the Pi will act all twitchy or may not power up at all.
Also, the Pi needs at least 700 milliamps in order to function correctly. But unlike the volts, the more the merrier. I use a full 2 amps (2000 milliamps) to power mine, this way I can pretty much plug anything I want into it.
Well, That concludes today's class. Hope you enjoyed it. If you have any comments, feel free to email me or tweet me or just walk up to me at Lake and Morgan, Monday through Friday 4pm -8pm (except the next several Mondays which will be 4pm - 6pm). This is where I sell Streetwise. On Saturday and Sunday, I'm at Our Lady of Mount Carmel (located on Belmont half way between Halstead and Broadway) from 2pm to 6pm on Saturday and @pm to 8:30pm on Sunday.
I may be making changes to this tutorial based upon feedback. You tell me what you need.
Till next time, keep on computing!
No comments:
Post a Comment